Multiple Learning Modules
Introduction
Thus far, we have been working with models that use a single agent with a single sensor which connects to a single learning module. In the context of vision, this is analogous to a small patch of retina that picks up a small region of the visual field and relays its information to its downstream target--a single cortical column in the primary visual cortex (V1). In human terms, this is like looking through a straw. While sufficient to recognize objects, one would have to make many successive eye movements to build up a picture of the environment. In reality, the retina contains many patches that tile the retinal surface, and they all send their information to their respective downstream target columns in V1. If, for example, a few neighboring retinal patches fall on different parts of the same object, then the object may be rapidly recognized once columns have communicated with each other about what they are seeing and where they are seeing it.
In this tutorial, we will show how Monty can be used to learn and recognize objects in a multiple sensor, multiple learning module setting. In this regime, we can perform object recognition with fewer steps than single-LM systems by allowing learning modules to communicate with one another through a process called voting. We will also introduce the distant agent, Monty's sensorimotor system that is most analogous to the human eye. Unlike the surface agent, the distant agent cannot move all around the object like a finger. Rather, it swivels left/right/up/down at a fixed distance from the object.
Don't have the YCB Dataset Downloaded?
You can find instructions for downloading the YCB dataset here. Alternatively, you can run these experiments using the builtin Habitat primitives, such as
capsule3DSolidandcubeSolid. Simply change the items in theobject_nameslist.
Setting up and Running a Multi-LM Pretraining Experiment
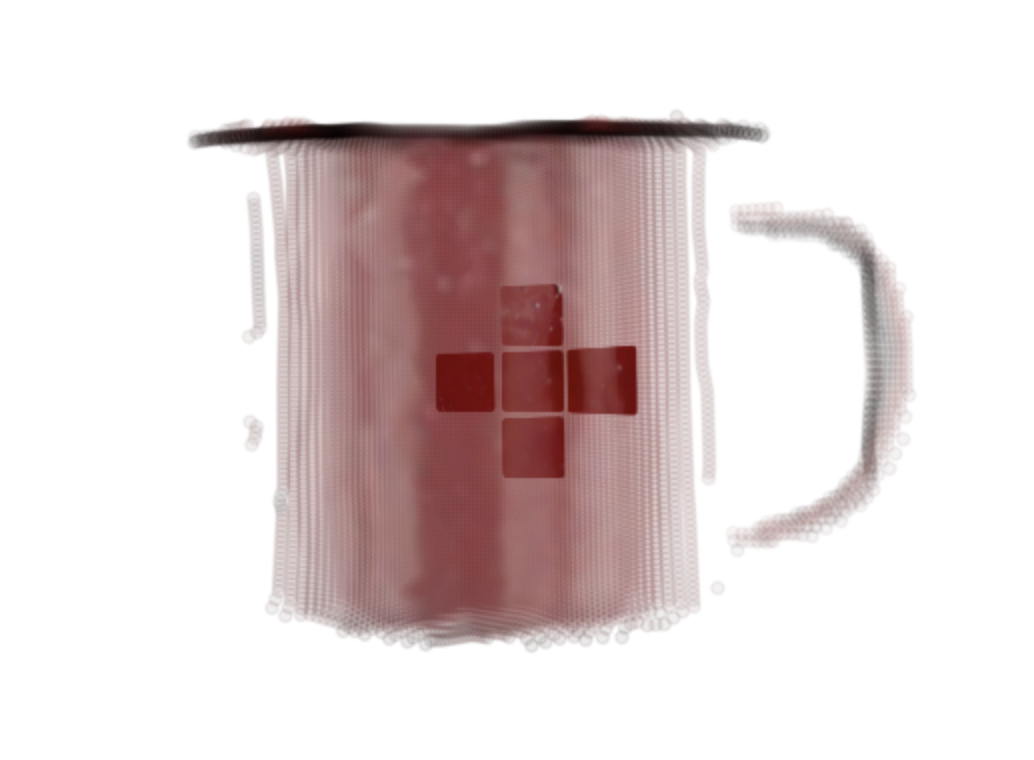
In this section, we'll show how to perform supervised pretraining with a model containing six sensor modules, of which five are connected in a 1:1 fashion to five learning modules (one sensor module is a viewfinder for experiment setup and visualization and is not connected to a learning module). By default, the sensor modules are arranged in cross shape, where four sensor modules are displaced a small distance from the center sensor module like so:

To follow along, open the src/tbp/monty/conf/experiment/tutorial/dist_agent_5lm_2obj_train.yaml file.
defaults:
  # Use supervised_pretraining for config defaults.
  - /experiment/config/supervised_pretraining@config
  - /experiment/config/logging/[email protected]
  # Specify the Monty model. The five_lm config contains all of the sensor module
  # configs, learning module configs, and connectivity matrices we need.
  - /experiment/config/monty/[email protected]_config
  - /experiment/config/monty/args/[email protected]_config
  - /experiment/config/monty/args/[email protected]_config.monty_args
  - /experiment/config/monty/motor_system/[email protected]_config
  - /experiment/config/monty/motor_system/[email protected]_config.motor_system_config
  # Set up the environment and agent.
  - /experiment/config/environment/[email protected]_interface_config
  # Set up the training environment interface.
  - /experiment/config/environment_interface/[email protected]_env_interface_args

# The MontySupervisedObjectPretrainingExperiment class will provide the model
# with object and pose labels for supervised pretraining.
_target_: tbp.monty.frameworks.experiments.pretraining_experiments.MontySupervisedObjectPretrainingExperiment
config:
  n_train_epochs: ${benchmarks.rotations_all_count}
  logging:
    # Specify directory where an output directory will be created.
    output_dir: ${path.expanduser:"~/tbp/results/monty/projects"}
    run_name: dist_agent_5lm_2obj_train
  monty_config:
    monty_args:
      num_exploratory_steps: 500
  train_env_interface_class: ${monty.class:tbp.monty.frameworks.environments.embodied_data.InformedEnvironmentInterface}
  train_env_interface_args:
    # Specify the objects to train on.
    object_names:
      - mug
      - banana
    object_init_sampler:
      _target_: tbp.monty.frameworks.environments.object_initializers.Predefined
      # Specify the objects to train on 14 unique object poses.
      rotations: ${benchmarks.rotations_all}
If you've read the previous tutorials, much of this should look familiar. As in our pretraining tutorial, we've configured a MontySupervisedObjectPretrainingExperiment with a src/tbp/monty/conf/experiment/config/logging/pretrain logging configuration. However, we are now using a built-in Monty model configuration called src/tbp/monty/conf/experiment/config/monty/five_lm that specifies everything we need to have five HabitatSM sensor modules that each connect to exactly one of five DisplacementGraphLM learning modules. src/tbp/monty/conf/experiment/config/monty/five_lm also specifies that each learning module connects to every other learning module through lateral voting connections. Note that GraphLM learning modules used in previous tutorials would work fine here, but we're going with the default DisplacementGraphLM for convenience (this is a graph-based LM that also stores displacements between points, although these are generally not used during inference at present). To see how this is done, we can take a closer look at the src/tbp/monty/conf/experiment/config/monty/five_lm configuration which contains the following lines:
sm_to_lm_matrix:
  - [0]
  - [1]
  - [2]
  - [3]
  - [4]
  # View finder (sm5) not connected to lm

# For hierarchically connected LMs.
lm_to_lm_matrix: null

# All LMs connect to each other
lm_to_lm_vote_matrix:
  - [1, 2, 3, 4]
  - [0, 2, 3, 4]
  - [0, 1, 3, 4]
  - [0, 1, 2, 4]
  - [0, 1, 2, 3]
sm_to_lm_matrix is a list where the i-th entry indicates the learning module that receives input from the i-th sensor module. Note, the view finder, which is configured as sensor module 5, is not connected to any learning modules since sm_to_lm_matrix[5] does not exist. Similarly, lm_to_lm_vote_matrix specifies which learning modules communicate with each for voting during inference. lm_to_lm_vote_matrix[i] is a list of learning module IDs that communicate with learning module i.
We have also specified that we want to use a src/tbp/monty/conf/experiment/config/monty/motor_system/naive_scan_spiral for the motor system. This is a learning-focused motor policy that directs the agent to look across the object surface in a spiraling motion. That way, we can ensure efficient coverage of the entire object (of what is visible from the current perspective) during learning.
Finally, we have also set the env_interface_config to src/tbp/monty/conf/experiment/config/environment/five_lm_mount_habitat. This specifies that we have five HabitatSM sensor modules (and a view finder) mounted onto a single distant agent. By default, the sensor modules cover three nearby regions and otherwise vary by resolution and zoom factor. For the exact specifications, see src/tbp/monty/conf/experiment/config/environment/init_args/five_lm_mount.
To run this experiment, call the run.py script like so:
python run.py experiment=tutorial/dist_agent_5lm_2obj_train
Setting up and Running a Multi-LM Evaluation Experiment
We will now specify an experiment config to perform inference.
To follow along, open the src/tbp/monty/conf/experiment/tutorial/dist_agent_5lm_2obj_eval.yaml file.
defaults:
  - /experiment/config/eval@config
  - /experiment/config/logging/[email protected]
  - /experiment/config/monty/[email protected]_config
  - /experiment/config/monty/args/[email protected]_config
  - /experiment/config/monty/args/[email protected]_config.monty_args
  - /experiment/config/monty/learning_modules/[email protected]_config
  - /experiment/tutorial/dist_agent_5lm_2obj/[email protected]_config.learning_module_configs.learning_module_0
  - /experiment/tutorial/dist_agent_5lm_2obj/[email protected]_config.learning_module_configs.learning_module_0.feature_weights.patch_0
  - /experiment/tutorial/dist_agent_5lm_2obj/[email protected]_config.learning_module_configs.learning_module_0.tolerances.patch_0
  - /experiment/tutorial/dist_agent_5lm_2obj/[email protected]_config.learning_module_configs.learning_module_1
  - /experiment/tutorial/dist_agent_5lm_2obj/[email protected]_config.learning_module_configs.learning_module_1.feature_weights.patch_1
  - /experiment/tutorial/dist_agent_5lm_2obj/[email protected]_config.learning_module_configs.learning_module_1.tolerances.patch_1
  - /experiment/tutorial/dist_agent_5lm_2obj/[email protected]_config.learning_module_configs.learning_module_2
  - /experiment/tutorial/dist_agent_5lm_2obj/[email protected]_config.learning_module_configs.learning_module_2.feature_weights.patch_2
  - /experiment/tutorial/dist_agent_5lm_2obj/[email protected]_config.learning_module_configs.learning_module_2.tolerances.patch_2
  - /experiment/tutorial/dist_agent_5lm_2obj/[email protected]_config.learning_module_configs.learning_module_3
  - /experiment/tutorial/dist_agent_5lm_2obj/[email protected]_config.learning_module_configs.learning_module_3.feature_weights.patch_3
  - /experiment/tutorial/dist_agent_5lm_2obj/[email protected]_config.learning_module_configs.learning_module_3.tolerances.patch_3
  - /experiment/tutorial/dist_agent_5lm_2obj/[email protected]_config.learning_module_configs.learning_module_4
  - /experiment/tutorial/dist_agent_5lm_2obj/[email protected]_config.learning_module_configs.learning_module_4.feature_weights.patch_4
  - /experiment/tutorial/dist_agent_5lm_2obj/[email protected]_config.learning_module_configs.learning_module_4.tolerances.patch_4
  - /experiment/config/monty/motor_system/[email protected]_config
  - /experiment/config/monty/motor_system/[email protected]_config.motor_system_config
  - /experiment/config/environment/[email protected]_interface_config
  - /experiment/config/environment_interface/[email protected]_env_interface_args

_target_: tbp.monty.frameworks.experiments.object_recognition_experiments.MontyObjectRecognitionExperiment
config:
  # load the pre-trained models from this path; this needs to be the same name as used for pretraining
  model_name_or_path: ${path.expanduser:"~/tbp/results/monty/projects/dist_agent_5lm_2obj_train/pretrained"}
  n_train_epochs: 1
  min_lms_match: 3 # Terminate when 3 learning modules makes a decision.
  logging:
    output_dir: ${path.expanduser:"~/tbp/results/monty/projects"}
    run_name: dist_agent_5lm_2obj_eval
    monty_handlers:
      - _target_: tbp.monty.frameworks.loggers.monty_handlers.BasicCSVStatsHandler
    wandb_handlers: []
  monty_config:
    monty_args:
      min_eval_steps: 20
    monty_class: ${monty.class:tbp.monty.frameworks.models.evidence_matching.model.MontyForEvidenceGraphMatching}
  eval_env_interface_class: ${monty.class:tbp.monty.frameworks.environments.embodied_data.InformedEnvironmentInterface}
  eval_env_interface_args:
    object_names:
      - mug
      - banana
    object_init_sampler:
      _target_: tbp.monty.frameworks.environments.object_initializers.Predefined
      rotations:
        - ${np.array:[0, 15, 30]} # A previously unseen rotation of the objects.
As usual, we set up our imports, save/load paths, and specify which objects to use and what rotations they'll be in. For simplicity, we'll only perform inference on each of the two objects once but you could easily test more by adding more rotations to the config.train_env_interface_args.object_init_sampler.rotations array.
Now we specify the learning module config. For simplicity, we define one learning module config and copy it to reuse settings across learning modules. We need only make two changes to each copy so that the feature_weights and tolerances reference the sensor ID connected to the learning module.
# src/tbp/monty/conf/experiment/tutorial/dist_agent_5lm_2obj/evidence_lm_config.yaml
learning_module_class: ${monty.class:tbp.monty.frameworks.models.evidence_matching.learning_module.EvidenceGraphLM}
learning_module_args:
  max_match_distance: 0.01, # =1cm
  # Use this to update all hypotheses > 80% of the max hypothesis evidence
  evidence_threshold_config: 80%
  x_percent_threshold: 20
  gsg:
    _target_: tbp.monty.frameworks.models.goal_state_generation.EvidenceGoalStateGenerator
    # Tolerance(s) when determining goal-state success
    goal_tolerances:
      location: 0.015 # distance in meters
    min_post_goal_success_steps: 5 # Number of necessary steps for a hypothesis
  hypotheses_updater_args:
    max_nneighbors: 10
# src/tbp/monty/conf/experiment/tutorial/dist_agent_5lm_2obj/patch_feature_weights.yaml
# Weighting saturation and value less since these might change under
# different lighting conditions.
hsv: ${np.array:[1, 0.5, 0.5]}
# src/tbp/monty/conf/experiment/tutorial/dist_agent_5lm_2obj/tolerance_values.yaml
hsv: ${np.array:[0.1, 0.2, 0.2]}
principal_curvatures_log: ${np.ones:2}
These are then imported into specific configuration paths corresponding to each learning module, and feature weights and tolerances dictionaries within them.
defaults:
  # ...
  - /experiment/config/monty/learning_modules/[email protected]_config
  - /experiment/tutorial/dist_agent_5lm_2obj/[email protected]_config.learning_module_configs.learning_module_0
  - /experiment/tutorial/dist_agent_5lm_2obj/[email protected]_config.learning_module_configs.learning_module_0.feature_weights.patch_0
  - /experiment/tutorial/dist_agent_5lm_2obj/[email protected]_config.learning_module_configs.learning_module_0.tolerances.patch_0
  - /experiment/tutorial/dist_agent_5lm_2obj/[email protected]_config.learning_module_configs.learning_module_1
  - /experiment/tutorial/dist_agent_5lm_2obj/[email protected]_config.learning_module_configs.learning_module_1.feature_weights.patch_1
  # ...
Finally, run the experiment.
python run.py experiment=tutorial/dist_agent_5lm_2obj_eval
Inspecting the Results
Let's have a look at part of the eval_stats.csv file located at ~/tbp/results/monty/projects/dist_agent_5lm_2obj_eval/eval_stats.csv.

Each row corresponds to one learning module during one episode, and so each episode now occupies a 5-row block in the table. On the far right, the primary_target_object indicates the object being recognized. On the far left, the primary_performance column indicates the learning module's success. In episode 0, all LMs correctly decided that the mug was the object being shown. In episode 1, all LMs terminate with correct while LM_1 terminated with correct_mlh (correct most-likely hypothesis). In short, this means that LM_1 had not yet met its evidence thresholds to make a decision, but the right object was its leading candidate. Had LM_1 been able to continue observing the object, it may well have met the threshold needed to make a final decision. However, the episode was terminated as soon as three learning module met the evidence threshold needed to make a decision. We can require that any number of learning modules meet their evidence thresholds by changing the min_lms_match parameter supplied in the experiment config. See here for a more thorough discussion on how learning modules reach terminal conditions and here to learn about how voting works with the evidence LM.
Like in our benchmark experiments, here we have min_lms_match set to 3. Setting this higher requires more steps but reduces the likelihood of incorrect classification. You can try adjusting min_lms_steps and see what effect it has on the number of steps required to reach a decision. In all cases, however, Monty should reach a decision quicker with five sensor modules than with one. This ability to reach a quicker decisions through voting is central to Monty. In our benchmark experiments, 5-LM models perform inference in roughly 1/3 of the steps needed for a single-LM distant agent model and with fewer instances of incorrect classification.
Lastly, note that num_steps is not the same for all learning modules in an episode. This is because one or more of the sensors can sometimes be aimed off to the side of an object. In this case, the off-object sensor module won't relay information downstream, and so its corresponding learning module will skip a step. (See here for more information about steps.) For example, we see that LM_1 in episode 1 only takes 8 steps while the others take 20-30. Since the sensor module connected to LM_1 was positioned higher than the others, we can surmise that sensor modules were aimed relatively high on the object, thereby causing the sensor module connected to LM_1 to be off-object for many of the steps.
Now you've seen how to set up and run a multi-LM models for both pretraining and evaluation. At present, Monty only supports distant agents with multi-LM models because the current infrastructure doesn't support multiple independently moving agents. We plan to support multiple surface-agent systems in the future.
Visualizing Learned Object Models (Optional)
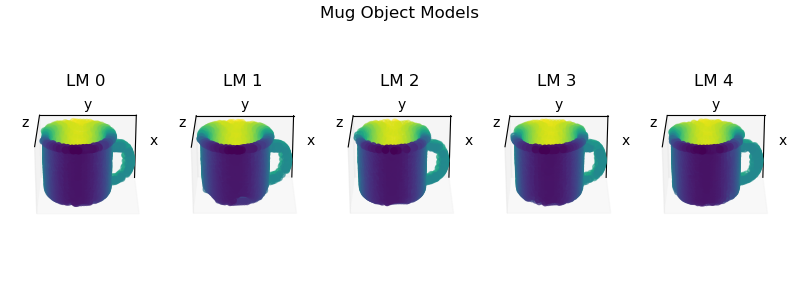
During pretraining, each learning module learns its own object models independently of the other LMs. To visualize the models learned by each LM, create and a script with the code below. The location and name of the script is unimportant so long as it can find and import Monty.
import os
from pathlib import Path

import matplotlib.pyplot as plt
import torch

from tbp.monty.frameworks.utils.plot_utils_dev import plot_graph

# Get path to pretrained model
project_dir = Path("~/tbp/results/monty/projects").expanduser()
model_name = "dist_agent_5lm_2obj_train"
model_path = project_dir / model_name / "pretrained" / "model.pt"
state_dict = torch.load(model_path)

fig = plt.figure(figsize=(8, 3))
for lm_id in range(5):
    ax = fig.add_subplot(1, 5, lm_id + 1, projection="3d")
    graph = state_dict["lm_dict"][lm_id]["graph_memory"]["mug"][f"patch_{lm_id}"]
    plot_graph(graph, ax=ax)
    ax.view_init(-65, 0, 0)
    ax.set_title(f"LM {lm_id}")
fig.suptitle("Mug Object Models")
fig.tight_layout()
plt.show()
After running the script, you should see the following:

Help Us Make This Page Better
All our docs are open-source. If something is wrong or unclear, submit a PR to fix it!
Updated 2 days ago
